Adventure in film- part 2
This post was long overdue. When I was purchasing the film camera in December (read the beginning of the story here), I did not realize how fun and easy it will be to take pictures with it. And how difficult it will be to get them out of the camera and onto a blog.
Step 1 – develop a film
I never considered developing the film myself. Few reasons. The Nikon N65 I bought is relatively modern and advanced, so it did not make much sense to put black and white film in it. Color film processing is a notch more complex. Additionally, it really is a lot of equipment and chemicals. I would probably given it more thought, were we still living back in Poland. My father has all the equipment needed, buried somewhere in the basement. I think it would be fun closing ourselves in the bathroom like when I was five years old and let the magic happen in front of our eyes. Here, it would not make much sense. Especially considering that it is not a problem (not yet, at least) to develop a film. Every photo lab does it, all grocery stores and camera stores around offer this dervice, and they all charge the same – $3.99 plus tax. So, develop in a place of choice and….
Well, here the trouble starts.
Step 2 – scanning a film
I was not really interested in getting prints from my film images. Not that it would help in any way. I do understand the arguments about material feel to a print etc. but I really prefer to take a look first and only print worthy images, which I can use to decorate the house, and not need to find a storage space for additional stuff. So no prints. CD only.
At first, I wanted to get as close to RAW I get from my digital camera as possible. I was dreaming about large TIFF or even DNG files, after reading this article about what sophisticated scanner software like VueScan can do nowadays. No luck when I started shopping around, all I could get were JPEGs.
OK, then, let’s have them large, at least. But how large? It is really hard to express film “resolution” in terms of digital photography. The best I found is this article by Ken Rockwell, trying to make some calculations.
Anyhow, at first try, in local Walgreens, I got files 1545 x 1024 px. I was very disappointed. For comparison, my iPhone 4 takes 3264 x 2448 px pictures. Yes, film Nikon with new lens has much better optics, dynamic range, no digital noise and overall is of better quality. But I went to look for a better option. The camera store in the larger town 25 miles away gave me comparable resolution as local camera store, 3090 x 2048 px. Bit better. The difference turned out to be in price. There, I can get three films on each CD, at $20 a CD. I drive up there from time to time, on the way North or back, sometimes to run an errand. so I get my film developed occasionally, when I have three films ready for processing.
Bottom line is, after reading about modern film shooting, I was expecting a far easier process. Maybe I just do not leave in the town large enough.
Also, all the trouble with organizing the analog workflow significantly slowed me down. I shoot film less, not knowing if I see the pictures over next month or so. While I am good with lack of instant feedback on the back LCD, waiting to see photos from three months bothers me. If for no other reason, hard to put on blod beautiful images of snow or ice now, when everything is in full bloom!
Will I shoot more at one point, enough to invest in the scanner? I don’t know, I am not sure it makes sense. Probably, I would quicker start digitizing film by using the camera, as described in great detail in this article by Gianluca Bevacqua on PetaPixel blog.
Step 3 – getting images on the computer
And I probably should mention that getting a CD with my scanned film photos is still not the end of the troubles. My new iMac does not have a driver anymore. I have to ask my husband each time to put them on our server with pictures for me ;).
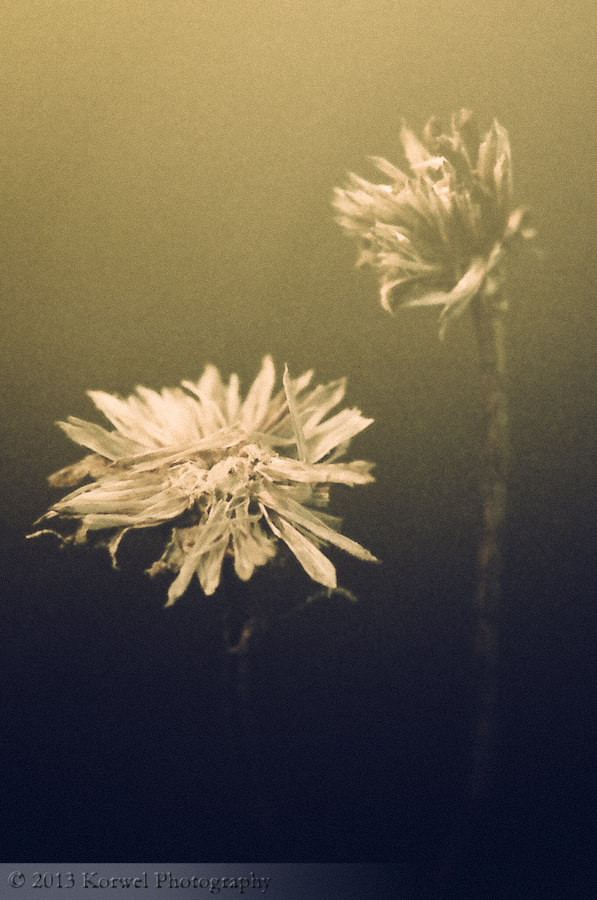
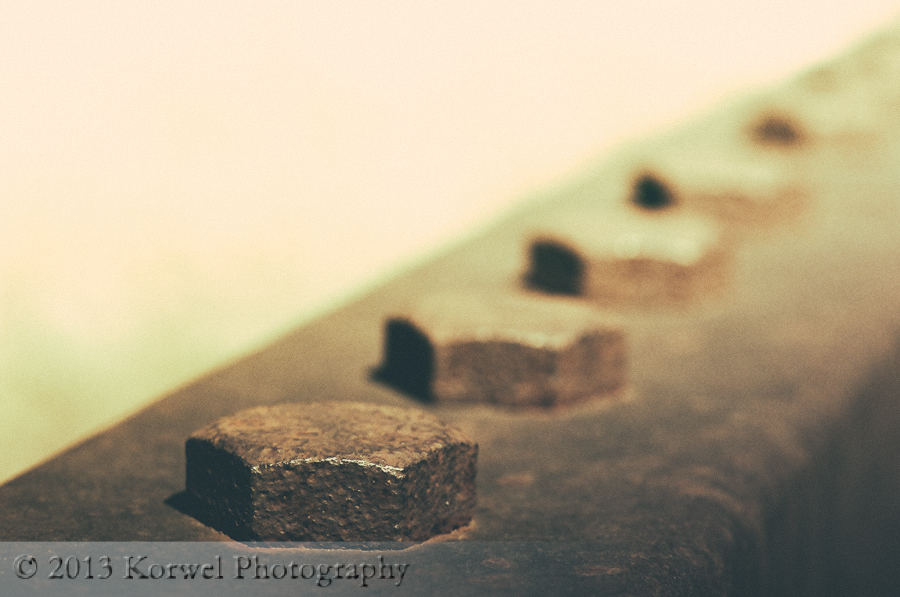
SO, if you were wondering how I enjoy me film shooting, this is the long answer. And couple of recent images, from the three rolls of film I just brought back. The oldest one was shot in February ;(. I used some of the new presets I did not have a chance to test yet, Dave Dalnea’s Lightroom 4 preset pack. I love the fact that you can stack those presets, and create combined effects- I used Backlit and Washed Vintage to achieve the effect.
And if anybody out there is shooting film, and have some tips and suggestions how to get more out of your analog files, please let me know in the Comments!
Some links in this post are affiliate links. See details of our affiliate policy here.